
Now that I have all the parts I set the repair plate on top of the subframe mount. Then I put the new bushing on that and bolted it in. I ran my large drift into the alignment holes at the edge and put the weight of the car on it to keep it still. Then I traced it with crayon.

This picture helps orient your view. This is the left front, that’s the firewall, and the subframe to the left.

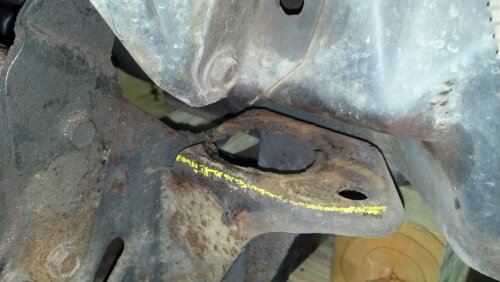
This shows the rusted subframe. The car was a daily driver for its early life and lots of salt accumulated and rusted under the bushing.

After jacking the body up and removing the new bushing and plate I cut in along the line to get access for my body saw. By the way I conferred with my friend the smart old guy and tried and tried to talk him into telling me to use torches for this cutting. He suggested everything else except torches. I finally gave in and listened. It’s good to have smart old guys as friends.

This air body saw worked quite well in the confined space I had to work in. I wanted to leave the original alignment hole.

It’s easier to shape the repair plate to fit the hole I made. I’m clamping it into position so I can go underneath and mark it with my sharpie.

With the repair plate clamped into the hole and the front edge clamped against the edge for butt welding I’m ready to mark. I used a sharpie to trace around the hole to find the parts of the repair plate that don’t look like my hole.

Test fitting the cut and ground and tapered repair plate. I’ve beveled the edges for weld penetration. The fit is excellent

I’ve welded the repair plate in and brushed it down with a wire brush. You can’t really tell except for a little overspray but I shot it with weld through zinc primer to keep it from oxidizing as I welded.

The bottom of the weld isn’t perfect but it’s pretty good considering the conditions. The alignment hole and bolt hole are a little off. The entire front subframe is off some.

The repair plate is welded solidly. I cleaned it up with a wire brush, cleaned it up, and painted it with Rustoleum. I’ll shoot a little undercoating around too to keep the paint from being chipped off. Next step is to put the bushing in and bolt it loosely while I do the rest.