More (worse) Tahoe problems

The Tahoe suddenly started smoking and using quite a bit of oil. I had an idea of what this would be and doing much chasing and reading I’m nearly 100% certain the AFM system (also called DOD) has failed predictably. AFM stands for Automatic Fuel Management and DOD stands for Displacement On Demand.

The system uses special lifters that can be collapsed to disable cylinders to presumably save fuel. Unfortunately it’s not just like switching between an 8 cylinder and a 4 cylinder since you keep all the drag of those idle cylinders. The trouble comes from plastic parts that wear early and critical split second timing to switch things.

The full repair would take my Tahoe down for days and be expensive since “while I’m in there” kicks in on an engine with more than 220k miles on it. I decided instead to buy a running used engine. I was still a firm believer that all that complicated stuff was worth having so I bought another engine with all that. After announcing the purchase I started hearing too many opinions that all that fancy stuff should be disabled permanently. I called a very trusted friend with huge experience and he echoed the sympathies.

>sigh< on top of buying the used engine I found I had to buy a bunch of parts to disable the system and that means tearing the new used motor down. Which I’m doing. At least I can still drive my smoky Tahoe while this goes on.

The new engine looks pretty good.

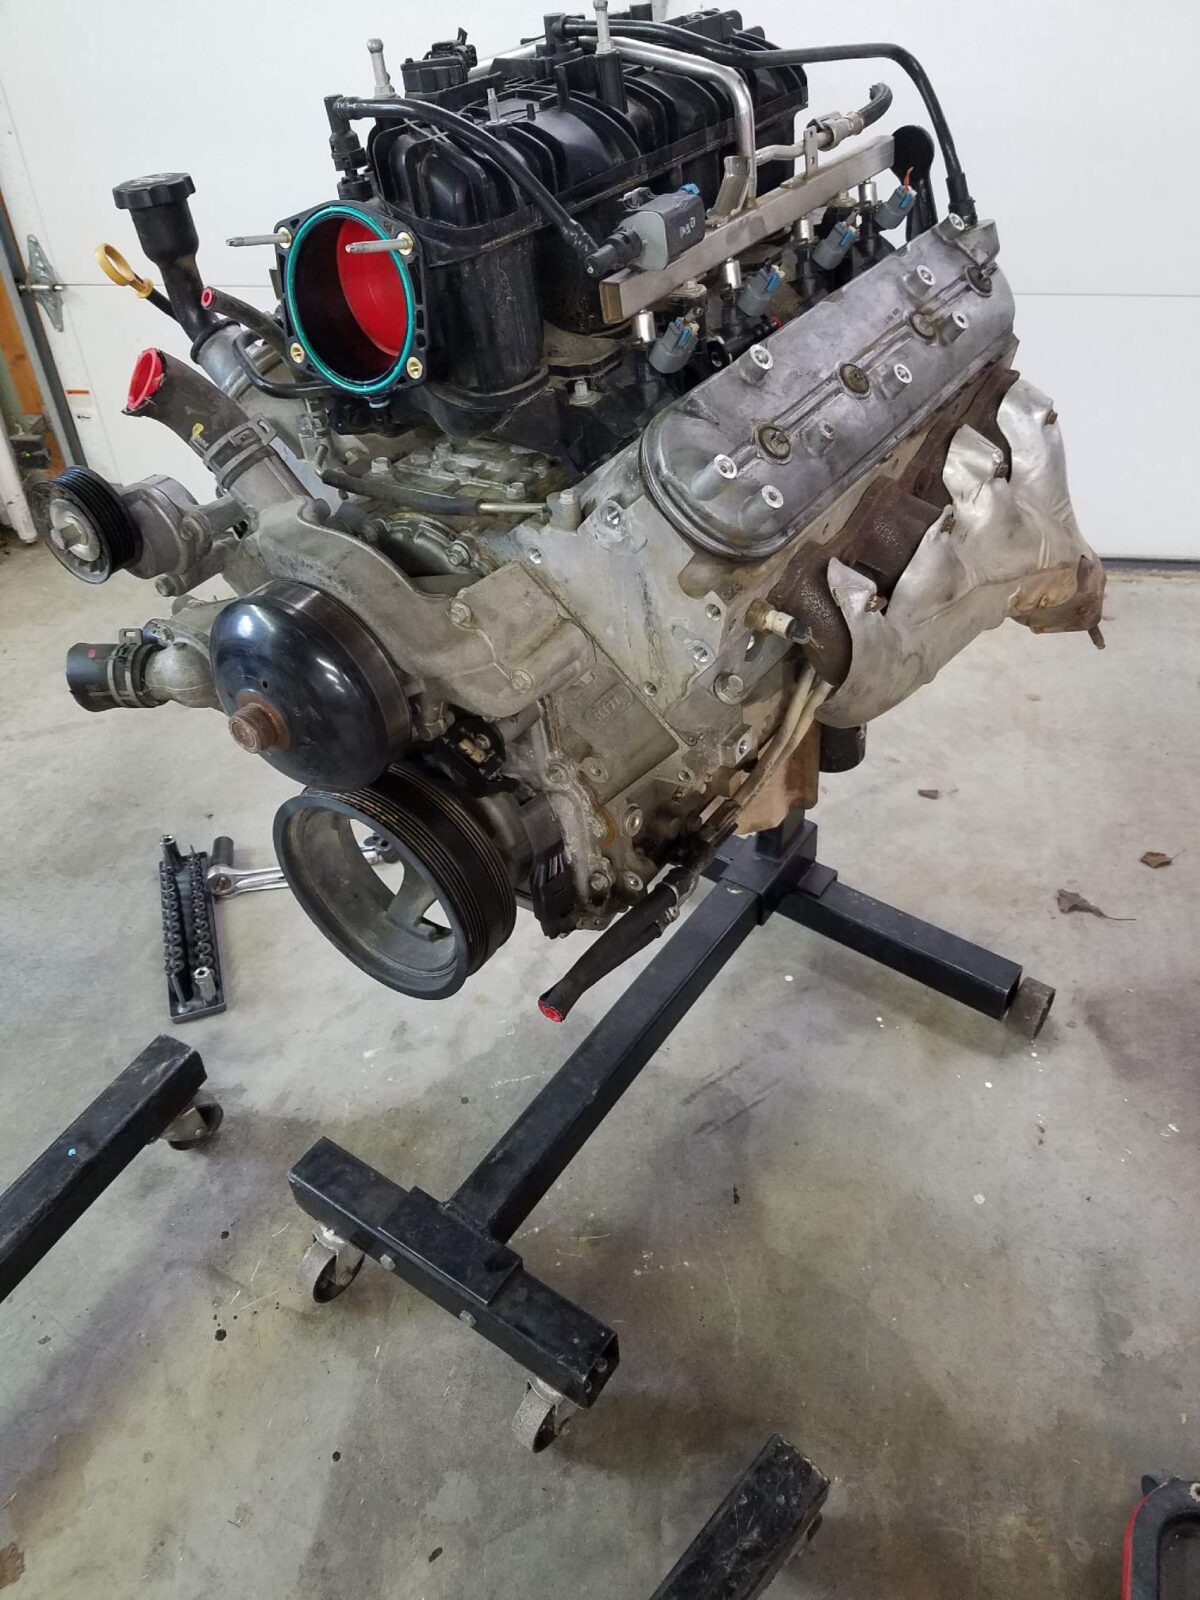
L94 engine on stand
New used engine for my Tahoe
L94 engine on stand
Another view of the engine

There are a few places that need attention in addition to installing my parts.

Looks like an oil leak
Low right side at rear of engine.
L94 engine on stand front pulley
Looks like some oil leaks at the crankshaft seal
L94 engine on stand oil filter
Looking at the oil filter block.

I’ve been stripping the block down ready to install the AFM delete kit and for general inspection. I knew from earlier that I had two broken exhaust manifold bolts and one missing.

Long broken exhaust bolt
Broken exhaust manifold bolt sticking up.
Long broken exhaust bolt out
This one just required a little preparation and vice grips
Another broken exhaust bolt flush
Broken exhaust bolt flush with the deck surface
Short broken exhaust bolt out
This one required preparation, drilling, and bolt extractor
L94 cylinder head
L94 cylinder head with stock springs

As part of the AFM delete it was recommended that I tap and plug these oil towers that fed the AFM system to prevent future oil leaks internally. I wouldn’t lose oil but could lose oil pressure.

Plugged oil towers
AFM oil towers plugged

Should be just a little more cleaning then I can start assembly. I’m learning slowly that the AFM delete kit I bought from Texas Speed has some of the stuff I need but oddly is missing a lot of obvious stuff. I need to make a final assessment of what I need and do one last shopping trip.

Valve spring time. The AFM delete kit includes an LS9 cam which requires new springs. I did a little research and found a cool tool to compress the springs.

One cylinder head on bench
This is my right side cylinder head on bench with old valve springs and seals.
Finger tight
Place this part in and finger tighten the bolts.
Tool in place
Once the tool is squared up and snug you go.

When you add this part you want to make sure the tension bolt is very close to centered between the valve springs and the compression plate is sitting squarely on the top of the valves. Then you can tighten the bolts down some to hold it to the head. Having read about problems galling the tension bolt and plate I used copious amounts of anti seize on it.

Compressing with keepers there
Compressing the springs I found a light tap frees the keepers

As you start applying tension I found a light tap will free the keepers which will be stuck in place some. On the bench I have a rag wadded up keeping the valves from dropping through this process. On the block you’d want air pressure, or the rope trick with the cylinder at TDC.

Valve stems
Look at those nice valve stems just sitting there.

Very simple to pull the keepers out. Nothing jumping around.

Springs out, old seals there
After pulling the old springs out I need to pop off those old seals.

Note that the base part of the tool just stays there while you do this. I figured out that way it stays perfectly aligned to put the new springs back in.

Springs and seals out
Springs and seals out, area wiped down.

With springs and old seals out I found lots of oil captured so I wiped that all down.

Fel Pro includes these
This slide over the top of the valve stem

Fel-Pro includes these little straws to protect the new seals from getting nicked when you slide them down past the keeper groove. I wipe the top down with a tiny bit of assembly lube before setting the seals on. I found a 12 point deep well 15/16 socket is just right for pushing the new seals down. I just pop it down with the heal of my hand.

Simple tool works great
This is my inexpensive valve spring compressor

This thing worked incredibly well. After the first cylinder I realized that I could double nut the tension bolt and not have to have my ratchet box in the way. Oddly my 1/2″ ratchet box wouldn’t slide over the top of the 13mm bolt head but worked fine on the 13mm nut. Actually I guess that’s not odd since 1/2″ is 12.5mm.

I did a quick inspection on the valves when I had them easy to drop out and they’re in good shape. The intake seats seemed dirty but I didn’t mess with them beyond wiping them down with acetone. Then using more acetone I cleaned the mating surfaces, layed down the new cylinder head gasket, and put the head on the block.

The new engine is assembled with the exception of swapping some parts from the old engine. Time to get the old engine out.

Wiring harness all over the engine
Look at all those wires

I dreaded getting the wiring harness loose. Turns out I was still too optimistic. The huge loom of wires starts at the fuse block, the firewall, and some more on the right side of the engine bay. I really need to examine the two ends of the loom I didn’t get loose. I took the fuse block apart and found large plugs I could pull loose. That wasn’t too bad. The rest of getting the wires loose from the engine was a nightmare.

Fuse box
Starting to dismantle the fuse box
Wiring harness peeled back
Wiring harness finally untangled and peeled back

I’m really scared I won’t be able to figure out all those wires that I lumped off to the right fender in a heap. It starts over there and at the firewall, crosses to the fuse block and engine computer, then wraps all over front to back underneath, back on top, and is a monster.

Mouse stuff on top of valley pan
My valley pan has housed mice

Once the wiring harness was off I removed the intake manifold to get access to the transmission bolts on the top of the block. Of course they were studded to hold wires and I had to remove a 13mm nut and hoses and wires to remove the plate to get access to the 15mm nut that attached the transmission. I had the transmission replaced with an used one a couple years ago. They didn’t get all those bolts back tight! A couple of them were very tight I guess to make up for that. Putting things back I’ll have to use the tightenough scale. No room for any torque wrenches I own.

At any rate I discovered there had been a mouse nest under the intake manifold on top of the valley pan. No desiccated mice though. Does this mean I have an official GM Mouse motor?

On the right rear of the valve cover is a stud holding the coil pack to the valve cover. The stud on top of that didn’t hold anything in place but did managed to snag the air conditioning hard lines at the fire wall when I was trying to remove the engine. I freed that and made some more progress only to have something snag again. Unbelievably it had caught a stray wire plug and snagged again. I’m putting a bolt in when I put things back.

The already leaking transmission cooler lines were also attached to the side of the block because why not. I discovered that when I tried to move the engine. I couldn’t get a wrench on the bolt to get it loose so I popped the lines out of the bracket. I should get new lines while I have so much apart. It’s only money. My credit cards are smoking, not on fire.

Engine hanging over the floor
My trusty engine hoist had the ability to lift it out with the truck up on jack stands

I bought this engine hoist at the Price Club. Remember them? This was early ’90s. It still works. I have lifted a complete Ford 460 with attached E4OD. I’ll keep it. At any rate there is the old engine. It’s really dirty. I tilted the intake manifold in getting it out and gross thick oil looking stuff poured out.

Odd story, I went to the auto parts store to rent a puller for the harmonic balancer. They were showing my the wrong things when I repeated fairly loudly that I needed one for an LS engine. Another customer in the store came over and told me he works on LS engines all the time and he had a puller I could borrow. He also had the extra long bolt for putting the harmonic balancer back on. I was welcome to borrow those if I wanted. DING! Heck of a nice guy. Drag races and swears by the 5.3. His current drag car has a 5.3 putting down 1000 HP. He said he runs nothing but E85 in his engines. They’re as clean as the day he builds them when he tears them down later. He keeps his car street legal, drives to the races, runs in the 5’s, and drives home.

Meanwhile back at the ranch.

Engine out of truck
I finally got the engine out.

The AC compressor is still charged. I need to read about the belt to the AC. I didn’t find a tensioner and had to pull the harmonic balancer with the belt dragging. One of the bolts on the compressor backed out against the frame without coming loose and I had to wait until the engine was otherwise loose to get it.

I skipped a few steps but the new engine is completed and installed. There were some running problems that got serious. The computer would only let the engine run for a couple seconds at a time so it had to go back to the tuner. I had AAA tow it there and they were not super good at communicating what was going on. I went up and picked up the truck with them making statements about a blocked catalytic converter and issues with driving farther than 5 or 10 miles at a time. Okay, I can get it home.

It never got above 20 mph and there were some very serious problems with running. I had to give up when my oil pressure suddenly went to zero. My battery died fairly quickly while sitting on the road waiting for AAA to take me home where I could address the problems.

I could hear that the exhaust was blocked so my first task was to remove the Y pipe with catalytic converters (3 of them) to see what they looked like.

Catalyst crumbs
Catalyst crumbs.

That came pouring out of the exhaust once it was out.

Closer look:

Closer look at catalyst crumbs
Closer look at catalyst crumbs.
Closeup picture of Catalyst crumbs
Closeup look at the crumbs that were the honeycomb catalyst.

This is melted down and demolished. I didn’t break this up, it was like this on the car. Not at all like it was supposed to be. I’ve already ordered the new Y pipe and catalysts. While I wait for that to arrive I will finish clearing the pipe out so I can get exhaust through it and put it back in place to try to figure out how badly I injured my new engine.

I now understand more about what happened to the old engine. Since the exhaust couldn’t get through that mess it pressurized the block and blew oil out. Various bumps could sift the crumbs around and let some exhaust out so the symptoms were sporadic.

Old Iron block 5.3 on pallet
Old iron block 5.3 on pallet.

Add bluetooth streaming to my factory stereo ’09 Tahoe

I’ve been hating having to plug my cell phone into the Aux jack to get streaming music and navigation from Waze through the speakers. It has required me pulling my phone out and putting it in a mount with a cord that hangs between my stereo and my phone. Getting out it’s difficult to get my phone back into my pocket until I’m standing up. I’ve dropped my phone a couple of times doing the dance with keys, phone, and any kind of thing I carried in my right front seat.


I searched for a while and was about to settle on a unit that plugs into a cigarette lighter and has yet another cord running up to the stereo. I’d still need to pull the plug out of the power since that’s not switched. I wasn’t really liking the idea of that solution. I continued searching. Then I found a thing on Crutchfield’s website. It’s the “Crux BTS-GM1X Bluetooth Interface” and connects to the factory XM unit and adds audio streaming ONLY. That leaves the phone ALSO bluetooth connected to my handsfree connection in the Tahoe for phone calls. Here’s the link for now: https://www.crutchfield.com/p_249BTSGM1X/Crux-BTS-GM1X-Bluetooth-Interface.html?search=Crux_BTS-GM1X_Bluetooth_Interface&skipvs=T 

It came today and I unpacked it on my passenger seat. 

That’s the whole thing. The black box does the magic, and the cable wires it in via the XM unit behind my glovebox. Oh and I can still use XM. This acts like another channel on XM.

Release tab to drop out the glovebox

It only took a second to release the glovebox so it tilted down into the footwell. I dropped everything into the oversized box my  device came in.

It only took another couple of seconds to pull the plug out of my XM receiver. Another couple of seconds to connect the wire to the factory plugs and plug in that black box. I wire tied the box and wires back in and put all my junk (after a cleanup) back in the glovebox which simply swung back up and snapped into place.

After buttoning that up I turned on the key and selected XM from my tuner. I turned on bluetooth on my phone and located the new unit and connected to it. I was supposed to have to do some button pushing on the stereo to make it mate to my phone and select the streaming source but somehow it started streaming right away.

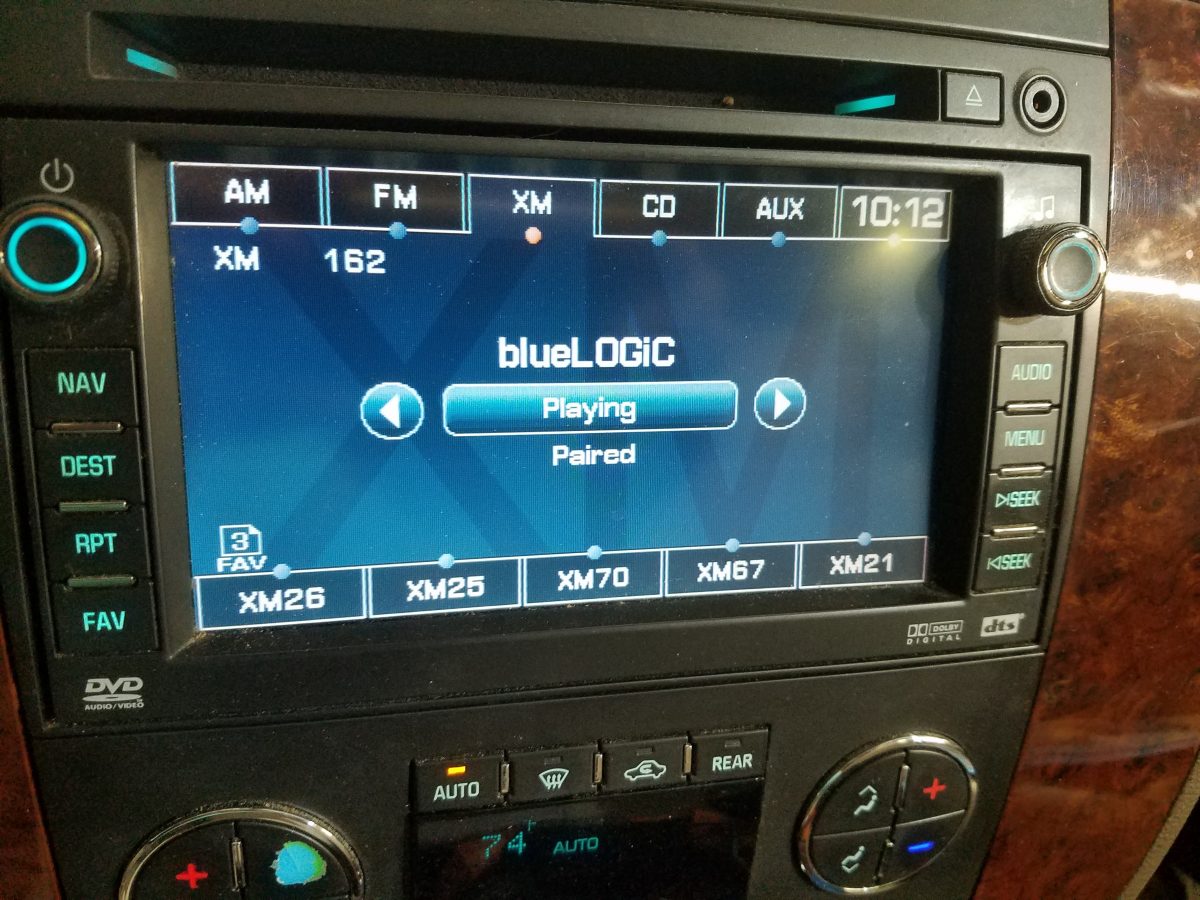
Stereo showing bluetooth unit streaming music.

It works well. I’ve seen that the connection via bluetooth is limited in range. That’s okay, likely the farthest I’ll get from it is pumping gas.

This was supposed to be snow

We had such dire predictions for snow today. The roads are all brined, my vehicles are salted – thanks to the brine. But it missed us.

Not only did it miss us but we got some nice weather. When Nat called and told me she needed a couple of documents I jumped on the bike to deliver.

I did a little bit of touring on my way home. I wanted to get a look at the progress on the new bridge at Dandridge. It’s moving along kinda slowly. That seems to be the way these go around here. Maybe the concrete needs to set up for a while before they continue…

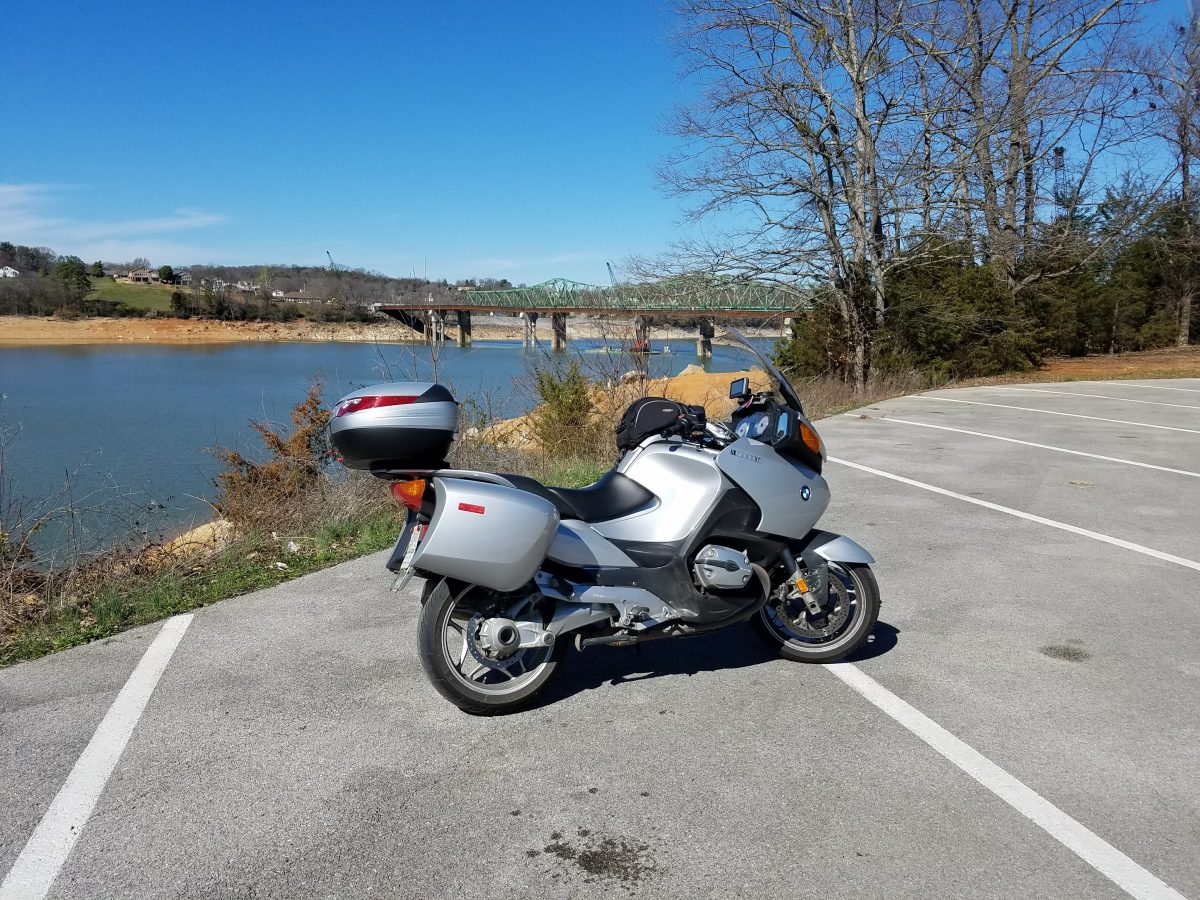
Checking on the progress on the new Dandridge bridge.

I also hit a couple of roads off 25/70 on the way home that took me into some cool areas I had never seen before. I’ll have to go back again when taking pictures is easier.

ADVer Tom from Brooklyn

Tom from Brooklyn took advantage of my posting on the ADV Tentspace Thread. Tom messaged me that he’d like to come down and ride around the Smokies. I said okay and the adventure was on. Tom came down mid-week and caught some rain coming in. We ate some dinner then talked some about what he had in mind. What he described was going to be a lot of riding. I tried to give him a route but honestly I’m not sure about all of it. That night I wasn’t really feeling like I wanted to spend the next day riding. We went to bed not too late and the next morning seemed like a pretty nice day for riding. I decided I’d at least get him started then I could let him go his own way later.

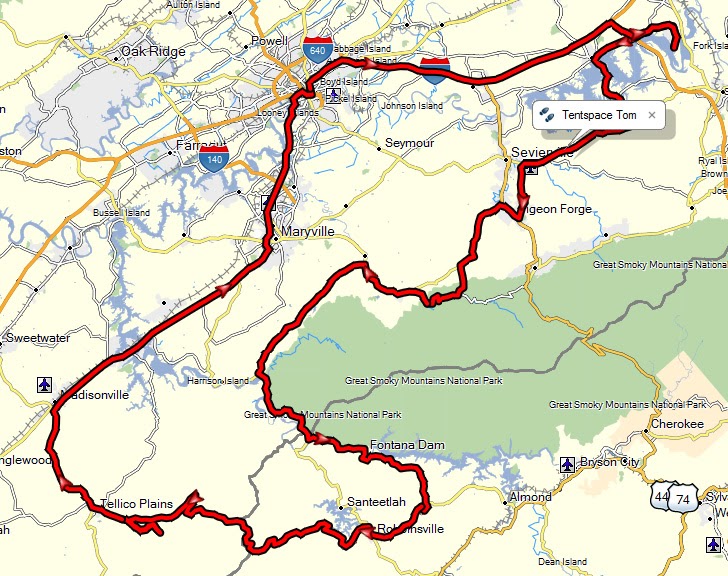
map with highlighted route
Loop from my house, out through the Dragon, back down the Cherohala Skyway, and home

As we were setting off for the day’s ride Tom grabbed a picture or two of our view of the lake and mountains. I don’t think there’s anything in Brooklyn, NY that looks like this.

Tom and his bike. Tom is getting pictures of our view.

Every motorcycle ride in the world seems to be aware of the “Dragon” which is a tortuously twisted road that folks like to test. It eats unaware drivers and riders. It’s famous for that. Tom wanted to do the dragon too so we headed that way first. I took a warm up route down highway 92 from Dandridge across the lake. I wanted to get out to route 411 which heads towards the mountains. Along the way we passed Blowing Cave road and I knew of an old mill out there I wanted to check in on. We detoured.

Mill on Blowing Cave Rd

After we left the cave we continued on route 411 until we got to Veterans Blvd which would take us out to Pigeon Forge. I thought it would be fun for Tom to see the tourist mecca that that place is. Parkway in Pigeon Forge didn’t disappoint. After some gawking along Parkway we turned up Wears Valley road. Tom waved me into an auto parts store to get himself some chain lube. Wears Valley road runs close to a friend’s house. It’s through him I knew of some of the nice roads I was going to take so we stopped in to see him. He hasn’t been able to ride for a while as he fought cancer. He’s got it beat now but hasn’t quite gotten back on his bike.

Kurt posing behind my and Tom's bikes with Tom alongside
Kurt posing behind my and Tom’s bikes with Tom alongside

Kurt took a little needling well and kept his smile. Off again we wanted to cut through part of the GSMNP. We continued out Wears Valley and turned onto Lyon Springs road. That took us in a little used entrance. We eventually emerged after some very scenic riding in Townsend. We were back on Wears Valley Rd. Riding a little farther we came to Foothills Parkway. That makes a nice connection to route 129 which becomes the Dragon.

We checked out some of the overlooks as we rode.

Balcony style overlook on Foothills Parkway

I have lots of pictures of the overlooks somewhere so I didn’t bother taking many shots. Tom got lots of pictures.

Before long we dropped out onto Tellico Lake on route 129. Tom had talked about wanting to take several runs at the Dragon so my plan was to go with him up into NC and wait at the store at the top. We got caught mostly behind the parade of much slower bikes aka Harleys. I rode much of it with my left hand resting in my lap as we rarely even got up to the speed limit. Once at the top we opted to grab a burger before Tom took more runs at it. Pretty soon he admitted his knees were still quaking and he would take more runs another time. We continued on. I prefer to bear left on route 28 along Cheoah Lake and down around the power plant at Fontana Dam. It’s a nice road with sweepers instead of hairpin turns and you can get into a rhythm if you know what you’re doing.

As we rode down I noticed a mist clinging to the top of the lake.

Smoke on the water. Mists at Fontana

Mists at Fontana
Mists at Fontana

Fontana generators
Fontana generators

Shortly after we crossed the lake on rte 28 the immense humidity began condensing into rain. I thought we might escape it soon so I delayed putting on rain gear. Alas it continued to rain and I didn’t dare press on at my limits leading a young rider so we stopped under some trees to dress for the rain. We followed my GPS towards Robbinsville which is the NC terminus of the Cherohala Skyway. When we got to the bustle of Robbinsville I was dreaming of a frosty treat at McDonalds. Of course there was one and I got my Mocha Frappe. mmm. I thought I’d never get Tom out of the dry air conditioned comfort there. We took our time as I finished my treat and both got dried out.

We spoke with another rider who had just come off the Skyway. He told us it was raining hard at the highest section. Hm. Not good news but I decided I’d risk riding without rain gear. If it started raining on us I could just put it on again. In the meantime I’d be a lot more comfortable.

Soon enough we were greeted by a park sign welcoming us to the Skyway.

park sign
Welcome sign describing the Cherohala Skyway

The skyway is full of good overlooks.

My 2007 R1200 RT at Santeetlah Gap

My bike at the Big Junction overlook on the Cherohala Skyway

Tom and his bike at an overlook on the Cherohala Skyway

As we neared Tellico Plains I remembered I wanted to see the Bald River Falls once before but misinterpreted a sign. I followed it correctly this time around.

picture of waterfall
Bald River Falls on August 8, 2013

It was starting to be a long day for both of us. Tom especially had ridden down from New York the day before all this. He wanted to go into Knoxville for some evening adventures and to launch from the next day. I led him down that way and just as we were getting into Knoxville we got separated. Tom followed some distance behind me regularly and I decided he wanted to take a different route but didn’t have a way to signal me. I continued on home and soon enough had a text from Tom indicating he was fine.

At the end of the day I had done 300 miles. I enjoyed the whole ride and was glad Tom had given me the incentive to get out and ride. Since this was August 8th it was also the anniversary of my father passing and made for a nice celebration of his life in my mind.